Create Custom Chat Interfaces
I'll teach you how to create beautiful, custom-branded chat interfaces that your customers can use to chat with your AI assistant. Think of it as creating your own customer support chat widget - but way more powerful!
What is a Chat Interface?
Think of a chat interface as a chat widget that you can put anywhere:
- On your website - Embed it like a support chat box
- As a standalone page - Share a link that opens a full chat page
- On your own domain - Make it look like it's part of your website (e.g.,
support.yourcompany.com)
The best part? You control everything:
- How it looks (colors, logo, fonts)
- What it says (welcome message, placeholder text)
- Where the AI gets its knowledge from (your own documents or an external API)
Your customers just see a beautiful chat interface that matches your brand. Behind the scenes, it's powered by AI that can answer questions, help with support, or do whatever you configure it to do!
Why Create a Chat Interface?
24/7 Customer Support
Your customers can get help anytime, even when you're sleeping! The AI never takes a break.
Professional Appearance
Instead of a generic chat widget, you get a fully branded experience. Customers see your logo, your colors, your messaging - it looks like it's part of your company.
Easy to Set Up
No coding required! You fill out a form, customize the colors, and you're done. Takes about 5-10 minutes.
Flexible AI Options
You can connect it to:
- A Knowledge Base - Upload your documents, FAQs, or manuals. The AI answers questions based on your content.
- An External API - Connect to your existing AI service or custom backend.
You choose what works best for you!
How to Create a Chat Interface
Here's the complete process, step by step. It's easier than you think!
Step 1: Go to Chat Interfaces
- Sign in to your Axie Studio account
- In the dashboard sidebar, click "Chat Interfaces"
- Click the "+ Create New Interface" button (top right)
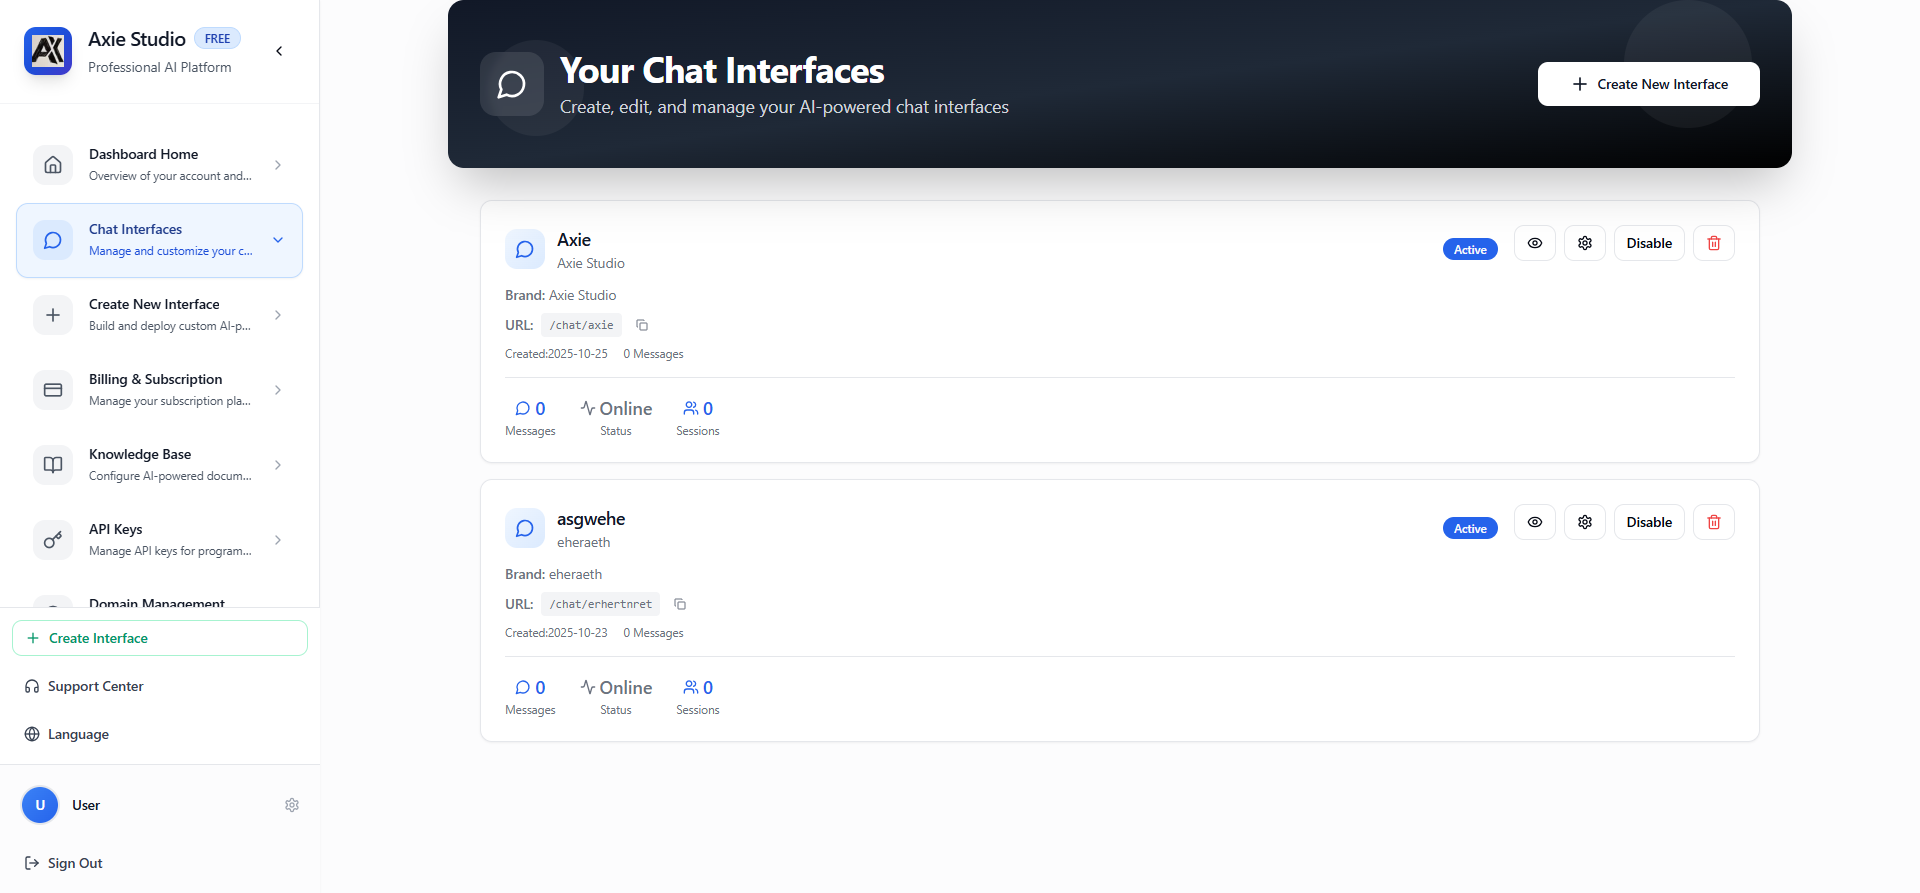
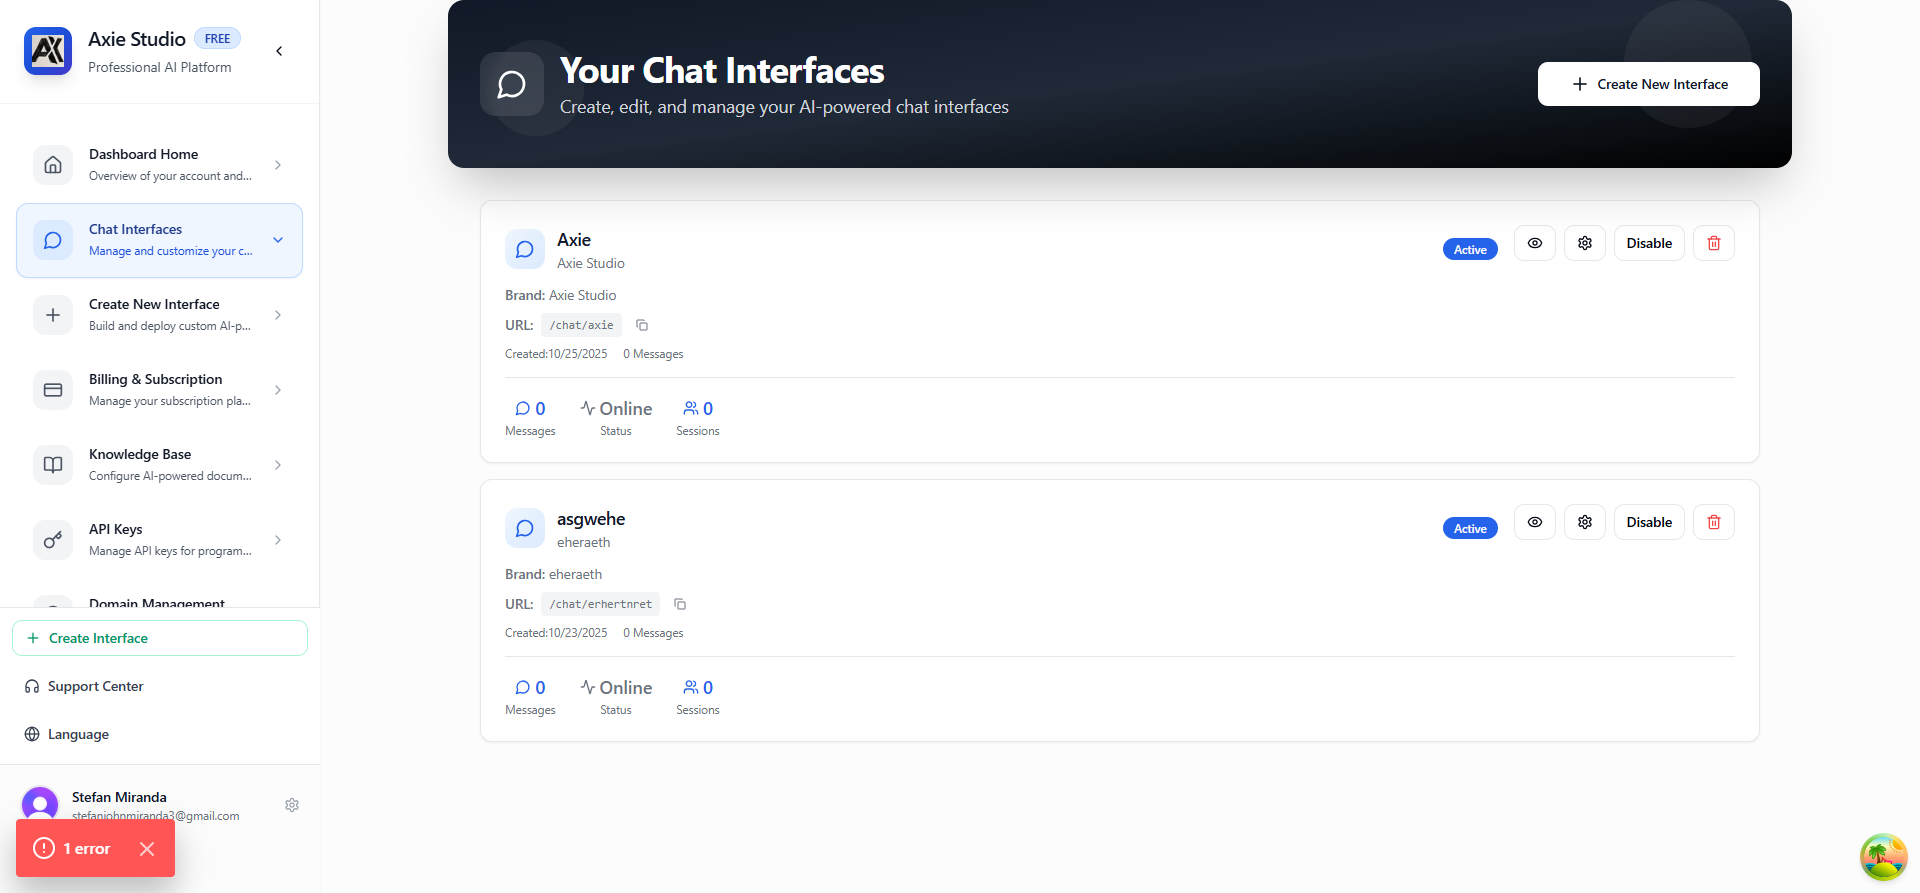
This is your chat interfaces dashboard. You'll see all your interfaces listed here, with their status, how many messages they've received, and quick action buttons. If this is your first interface, the list will be empty - that's normal!
Step 2: Basic Information
When you click "Create New Interface", you'll see a form. Let's start with the basics:
Name (required):
- This is just for you - to identify this interface in your dashboard
- Example: "Customer Support", "Sales Chat", "Help Desk"
- You can change this later
URL Slug (required):
- This is the unique identifier for your chat interface
- It becomes part of your public URL:
https://public.axiestudio.se/chat/your-slug - Must be lowercase, can include numbers and hyphens
- Example:
customer-support,help-desk,sales-chat - Pro tip: Click the magic wand icon (✨) to auto-generate a slug from your name!
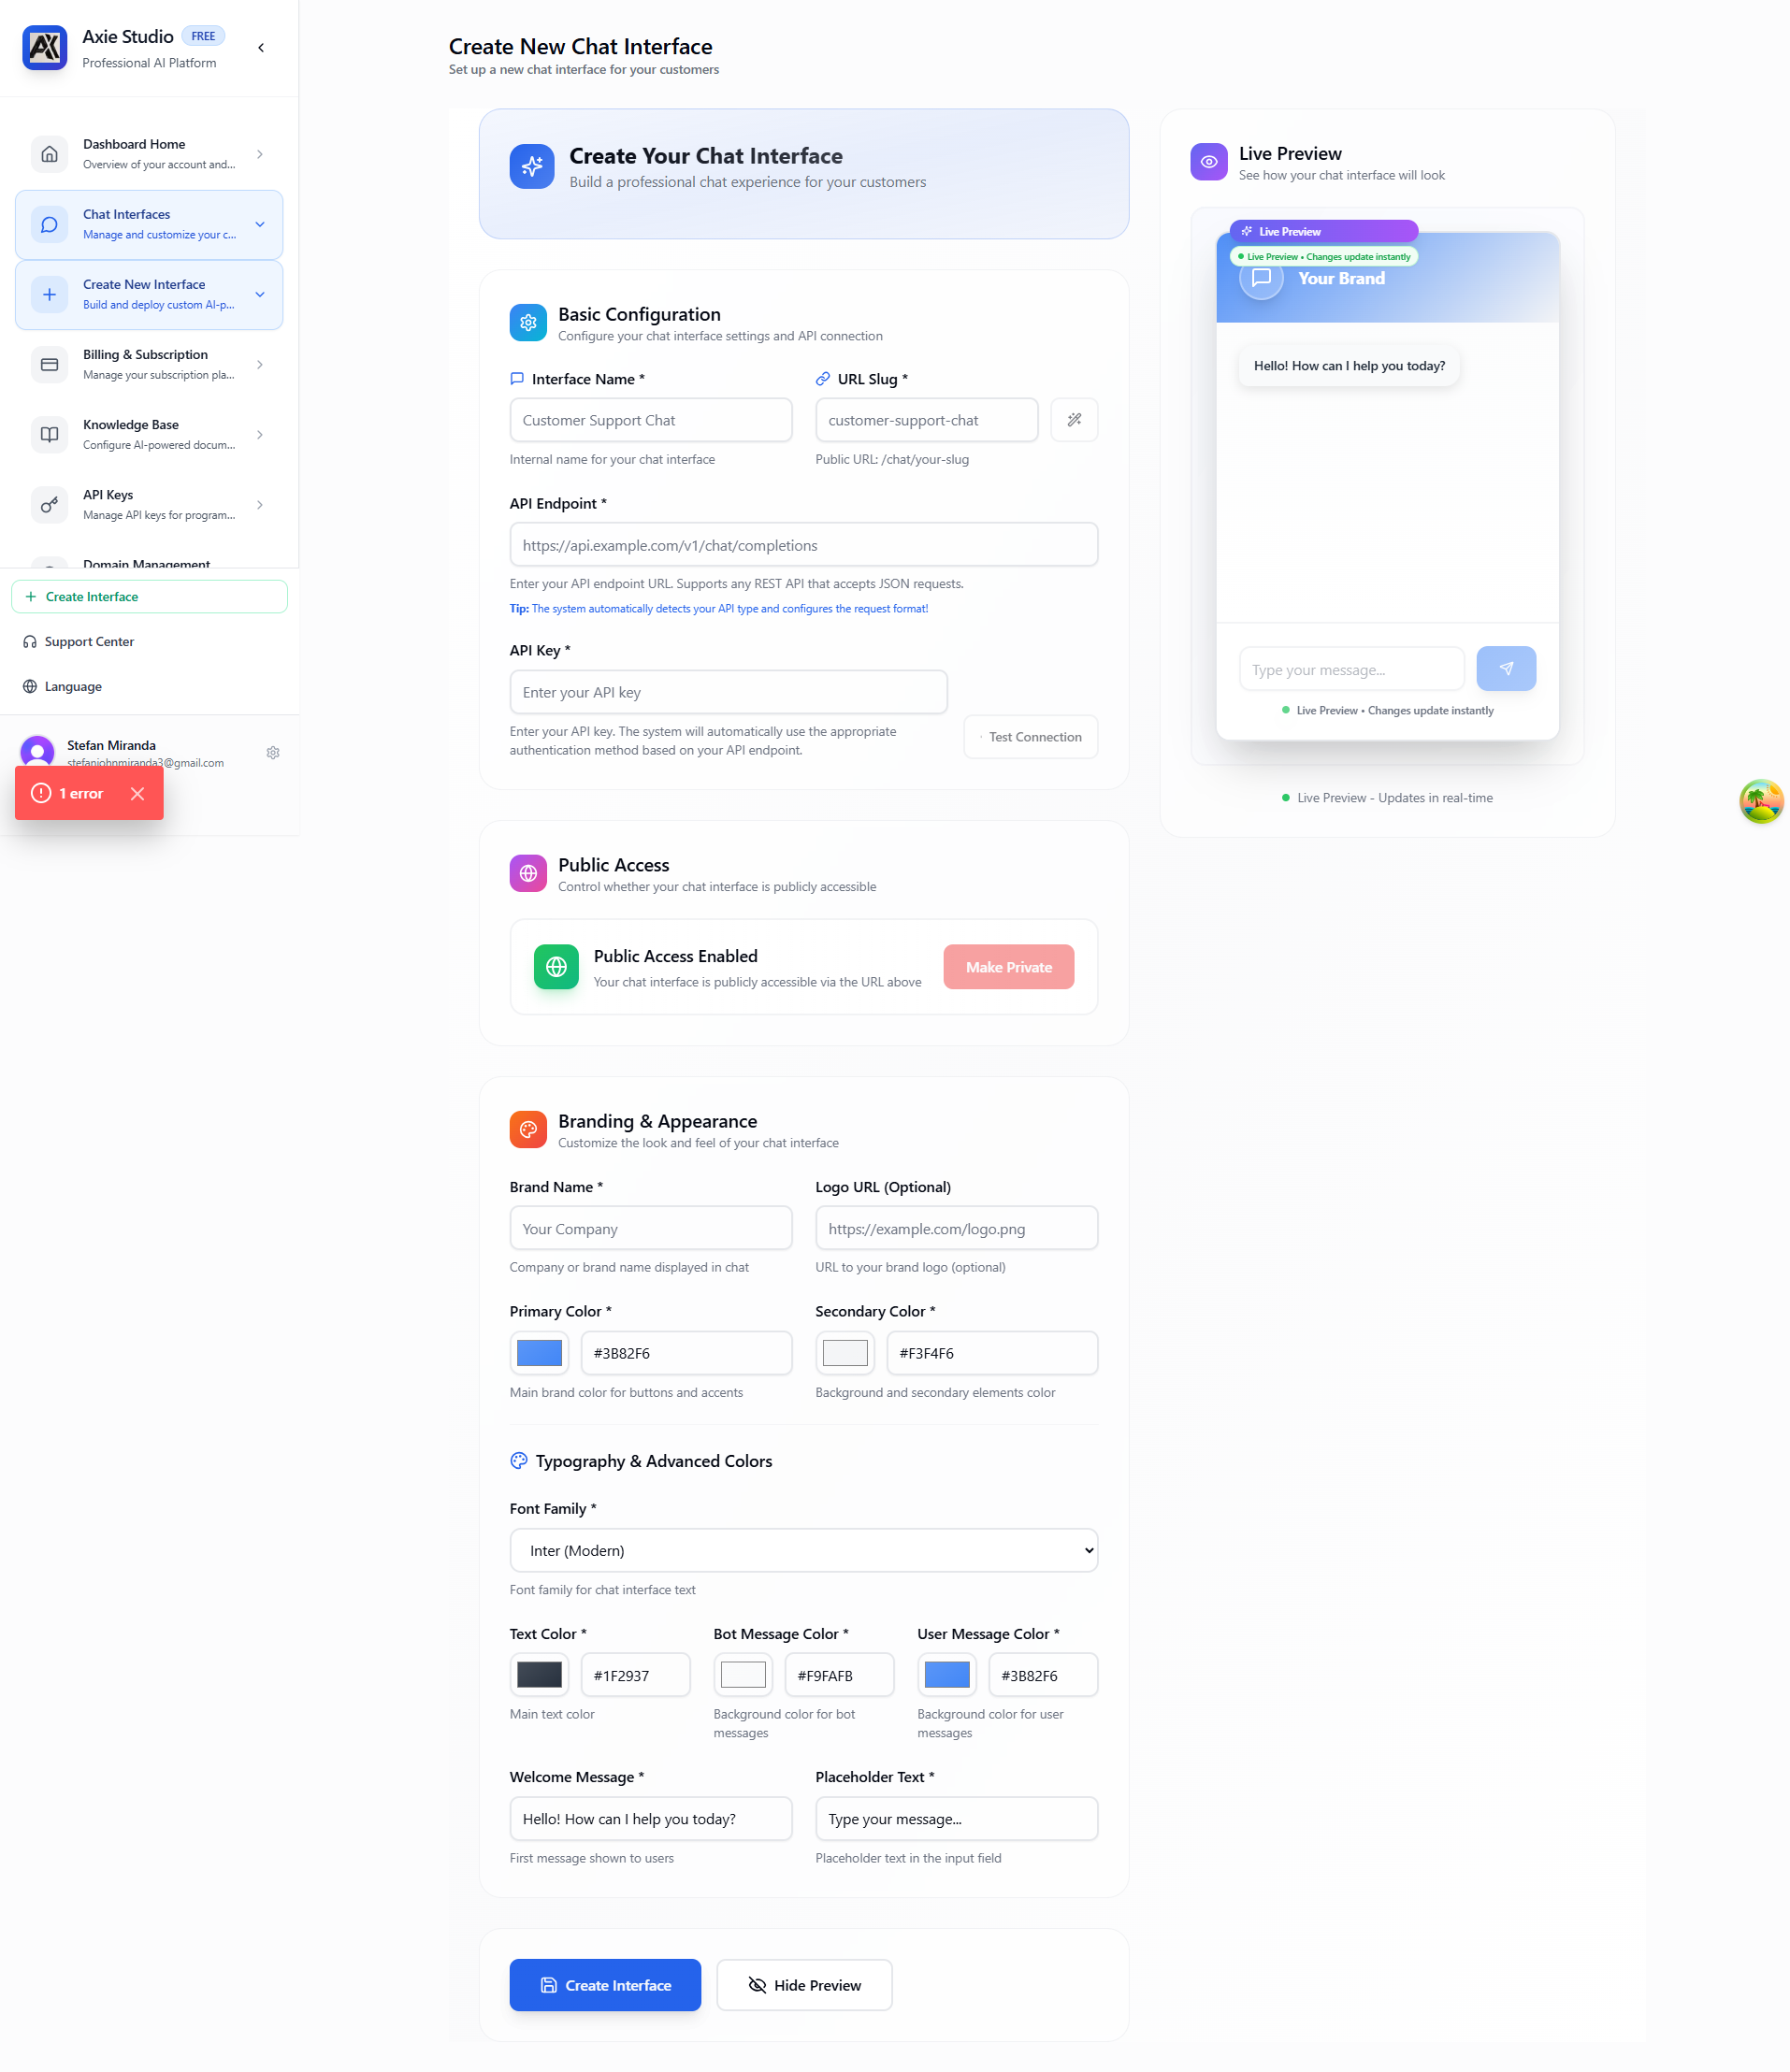
Choose your slug carefully! Once created, the slug can't be changed. Make it something clear and memorable - it's part of your public URL!
What happens next? After you enter the name and slug, you'll see a live preview on the right side that updates as you make changes. This lets you see exactly how your interface will look before you save it!
Step 3: Connect to Your AI
This is important! You need to tell the chat interface where to get its AI responses from. You have two options:
Option A: Use a Knowledge Base (Axie Studio's Built-in Solution)
This is Axie Studio's own RAG (Retrieval-Augmented Generation) system!
If you want the AI to answer questions based on your own documents (FAQs, manuals, support docs, etc.):
- Create a Knowledge Base first (see Knowledge Base documentation)
- Select that Knowledge Base when creating your chat interface
- The AI will use your documents to answer questions
Built-in AI Providers:
- OpenAI - GPT-5, GPT-4o, GPT-4o Mini, GPT-4 Turbo
- Cloudflare Workers AI - Llama 3.1 8B/70B Instruct
- DeepSeek - DeepSeek Chat/Coder
Best for: Customer support, documentation, FAQs, internal knowledge - when you want AI powered by your own documents
Option B: Connect to a Custom API Endpoint
For external integrations and self-hosted solutions
If you have an external AI agent or service (like Langflow, self-hosted agents, or custom APIs):
- API Endpoint: The full URL where your external service is hosted
- API Key: Your authentication key for that service
Use cases:
- DataStax Langflow - Connect to your Langflow flows
- LM Studio - Run LLMs locally on your computer (requires tunnel to expose)
- Self-hosted Langflow - Your own Langflow instance (must be publicly accessible)
- Self-hosted agents - Custom AI agents you've built (must be publicly accessible)
- Custom local APIs - Your own API endpoints (must be publicly accessible)
Important: If you're using a self-hosted or local service (like LM Studio or localhost APIs), you must expose it to the internet first using a tunneling service like Cloudflare Tunnel or ngrok. Axie Studio cannot access localhost directly!
Best for: When you already have an AI agent/flow configured elsewhere and want to use it with Axie Studio's chat interface
Not sure which to choose?
- Knowledge Base: Use this if you want to upload documents and have AI answer from them (Axie Studio handles everything)
- Custom API: Use this if you already have a Langflow flow, self-hosted agent, or custom API you want to connect to
For detailed information about connecting to custom API endpoints, see Custom API Endpoints →
Don't worry if you're not sure! You can start with a Knowledge Base (it's easier) and switch to an API later if needed. You can also change this anytime after creating the interface.
Step 4: Customize Branding
This is the fun part! Make it look like it belongs to your company.
Basic Branding:
- Brand Name: Your company name (shows at the top of the chat)
- Logo URL: A link to your logo image
- Best format: Transparent PNG
- Recommended size: 200x50 pixels
- Must be a publicly accessible URL (upload to your website or use an image hosting service)
Colors (all use color pickers - just click and choose!):
- Primary Color: Your main brand color (used for buttons, user messages)
- Secondary Color: Background/accent color
- Text Color: Color of the text in the chat
- Bot Message Color: Background color for AI responses
- User Message Color: Background color for user messages
Typography:
- Font Family: The font used throughout the interface
- Default is "Inter" (a modern, clean font)
- You can use any web-safe font or Google Fonts
Messages:
- Welcome Message: The first message customers see when they open the chat
- Example: "Hello! I'm here to help. What can I assist you with today?"
- Max 200 characters
- Placeholder Text: The hint text in the message input box
- Example: "Type your message here..."
- Max 100 characters
The best part: As you change any of these settings, you'll see the live preview update in real-time on the right side! You can experiment with colors and see exactly how it will look before saving.
All of these can be changed later! Don't stress about getting everything perfect the first time. You can always come back and tweak the colors, messages, or logo.
Step 5: Save and Deploy!
Once you've filled in the basic info, connected to your AI (Knowledge Base or API), and customized the branding:
- Scroll to the bottom of the form
- Click "Save Interface" (or "Create Interface" if it's a new one)
- Wait a few seconds - you'll see a success message
- You're done! 🎉
Your chat interface is immediately live at:
https://public.axiestudio.se/chat/your-slug
What happens when you save?
- Your interface is created and activated
- It's immediately accessible at the public URL
- You can share the link with customers right away
- You can embed it on your website
- You can set up a custom domain for it
That's it! No waiting, no deployment process - it just works.
Using Your Chat Interface
Now that you've created your interface, here are three ways to use it:
1. Share the Public URL
The simplest way: Just share the link with your customers!
https://public.axiestudio.se/chat/your-slug
They can click the link and start chatting immediately. No login required, no signup needed - it just works!
Your chat interface is completely public - anyone with the URL can use it. Perfect for customer support, sales inquiries, or general questions.
2. Embed on Your Website
Want it to appear directly on your website? Embed it as an iframe:
<iframe
 src="https://public.axiestudio.se/chat/your-slug"
 width="100%"
 height="600"
 frameborder="0">
</iframe>
Where to put this:
- On a dedicated support page
- In a modal/popup
- As a sidebar widget
- On your contact page
Pro tip: Adjust the height value (currently 600) to fit your page design. You can also use CSS to make it responsive!
3. Use Your Own Domain (Advanced)
Want it to look even more professional? Set up a custom domain so customers see:
https://support.yourcompany.com
instead of:
https://public.axiestudio.se/chat/your-slug
This makes it look like it's part of your website! Learn how to set up custom domains →
All three methods work the same way - customers get the same chat experience, just accessed differently!
Best Practices
Brand Consistency
- Match your chat interface colors to your website
- Use your company logo
- Keep messaging consistent with your brand voice
Clear Welcome Message
- Make it friendly and helpful
- Explain what customers can ask
- Set expectations about response time
Test Before Sharing
- Test the interface yourself
- Try different types of questions
- Make sure responses are appropriate
Monitor Performance
- Check analytics regularly
- See what customers are asking
- Improve based on usage patterns
Common Questions
Can I change the interface after creating it?
Yes! You can edit everything anytime:
- Change colors, logo, messages
- Switch between Knowledge Base and API
- Update branding
- Modify welcome message
Changes take effect immediately - no waiting, no deployment needed. Just save and it's live!
How many chat interfaces can I create?
This depends on your subscription plan:
- Free Plan: 1 interface
- Pro Plan: 20 interfaces
- Enterprise Plan: 100 interfaces
Check your dashboard to see your current limit and how many you've created.
Can I use my own domain?
Absolutely! Instead of public.axiestudio.se/chat/your-slug, you can use support.yourcompany.com.
Learn how to set up custom domains →
Can I connect multiple interfaces to the same Knowledge Base or API?
Yes! You can create multiple chat interfaces that all use:
- The same Knowledge Base (same documents, different branding)
- The same API endpoint (same AI service, different appearance)
This is useful if you want:
- Different interfaces for different departments (Support, Sales, etc.)
- Different branding for different products
- Different welcome messages for different use cases
What's the difference between Knowledge Base and API?
Knowledge Base:
- You upload your own documents (PDFs, text files, etc.)
- AI answers questions based on YOUR content
- Best for: Customer support, documentation, FAQs
- Easier to set up (no coding required)
- No external API needed - everything runs on Axie Studio
Custom API Endpoint:
- Connects to external AI services or self-hosted solutions
- Works with DataStax Langflow, self-hosted Langflow, self-hosted agents, or custom APIs
- The system automatically detects the API type and formats requests correctly
- You provide: API endpoint URL and API key
- Best for: External integrations, existing Langflow flows, self-hosted solutions
- Requires: Your own API endpoint and authentication key
Common use cases:
- You have a DataStax Langflow flow you want to use
- You run a self-hosted Langflow instance
- You have a custom AI agent or API you've built
- You want to connect to a local development server
You can switch between them anytime! Start with a Knowledge Base (easier) and switch to a custom API later if needed.
For detailed information about custom API endpoints, see Custom API Endpoints →
Next Steps
Ready to create your first interface? Go to your dashboard and click "Create New Interface"!