step-by-step-guide
sidebar_position: 2
Step- by- Step: Create Your First Chat Interface
This comprehensive guide walks you through creating your first chat interface in Axie Studio, with detailed steps and visual descriptions.
Overview
Time Required: 5- 10 minutes
What You'll Create: A fully functional, custom- branded chat interface
Result: A live chat interface at https://public.axiestudio.se/chat/your- slug
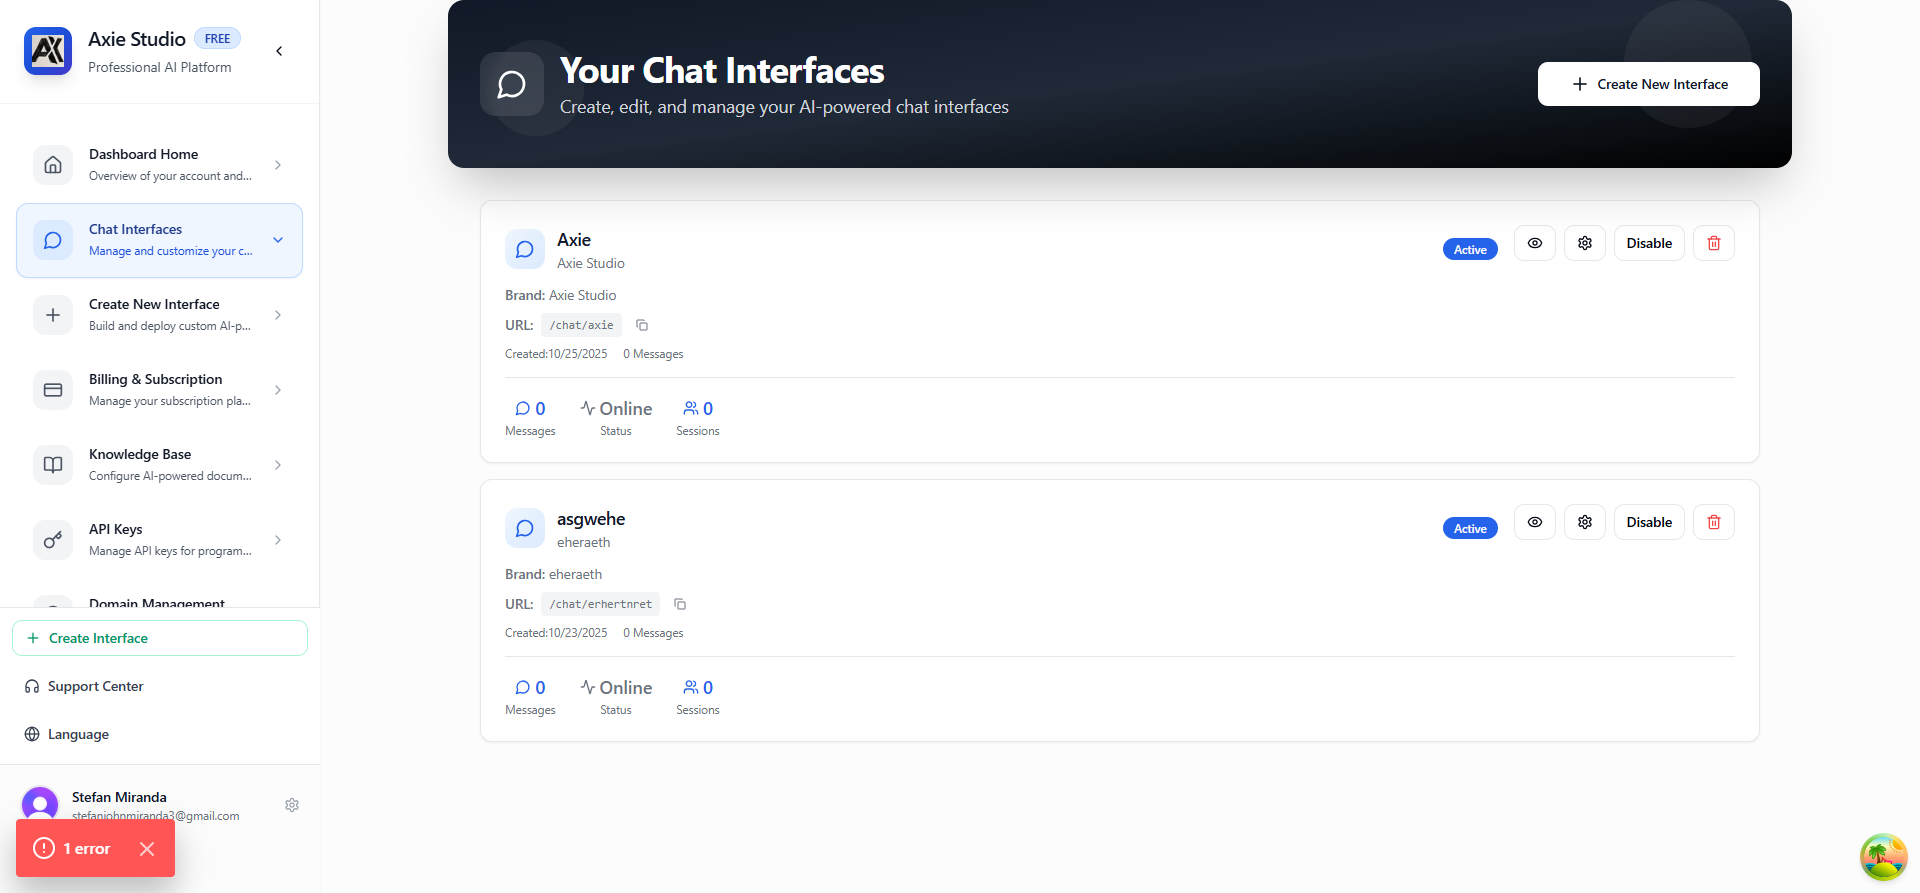
Step 1: Navigate to Chat Interfaces
What You'll See
- Sign in to your Axie Studio account
- In the dashboard sidebar, click "Chat Interfaces"
- You'll see the Chat Interfaces page with:
- A dark gradient header with "Chat Interfaces" title
- A "+ Create New Interface" button in the top right
- An empty list (if this is your first interface)
Visual Description
 [Dark Gradient Header]
 Chat Interfaces
 Create and manage your chat interfaces
 [+ Create New]


 [Empty State or Interface List]
Action
Click the "+ Create New Interface" button (or the link in the header).
Step 2: Fill in Basic Information
What You'll See
You'll be taken to the "Create New Chat Interface" page with a form split into sections:
- Left Side: Form fields
- Right Side: Live preview (updates as you type)
Step 2.1: Name Your Interface
Field: "Name" Location: Top of the form What to Enter: A descriptive name (e.g., "Customer Support", "Sales Chat")
Example:
Name: Customer Support
Visual:
 Name *

 Customer Support
Step 2.2: Create URL Slug
Field: "URL Slug" Location: Below Name field What to Enter: A URL- friendly identifier (lowercase, numbers, hyphens only)
Features:
- Auto- generates from name (click the magic wand icon)
- Must be unique
- 3- 50 characters
- Only lowercase letters, numbers, and hyphens
Example:
URL Slug: customer- support
Visual:
 URL Slug *

 customer- support

 [ Auto- generate from name]
Result: Your interface will be available at:
https://public.axiestudio.se/chat/customer- support
Step 3: Connect to Your AI
What You'll See
Two fields for API connection:
Step 3.1: API Endpoint
Field: "API Endpoint" Location: In the API connection section What to Enter: The full URL of your AI service endpoint (Langflow, OpenAI, or any custom API)
Examples:
https://your-langflow-instance.com/api/v1/run/your-flow-id
https://api.openai.com/v1/chat/completions
https://your-custom-api.com/chat
Visual:
 API Connection

 API Endpoint *

 https://your-api-endpoint.com/...
Step 3.2: API Key
Field: "API Key" Location: Below API Endpoint What to Enter: Your authentication key for that API (Langflow token, OpenAI key, etc.)
Features:
- Eye icon to show/hide the key
- Secure input field
- Required for authentication
Visual:
API Key *
Step 3.3: Test Connection (Optional)
Button: "Test Connection" Location: Next to API fields What It Does: Tests if your API endpoint and key work
Visual:
[ Test Connection]
Result: You'll see a success or error message.
Step 4: Customize Branding
What You'll See
A section with multiple branding options. The Live Preview on the right updates in real- time as you make changes.
Step 4.1: Brand Name
Field: "Brand Name" What to Enter: Your company or brand name
Example:
Brand Name: Acme Corporation
Step 4.2: Logo URL
Field: "Logo URL" What to Enter: URL to your logo image
Requirements:
- Must be a valid image URL
- Recommended: Transparent PNG
- Size: 200x50px works best
Example:
Logo URL: https://yourdomain.com/logo.png
Step 4.3: Colors
Fields: Multiple color pickers
- Primary Color: Main brand color
- Secondary Color: Accent color
- Text Color: Text color
- Bot Message Color: AI message background
- User Message Color: User message background
Visual:
 Primary Color *
 #3B82F6
 [Color Picker]
Tip: Use your brand colors for consistency!
Step 4.4: Font Family
Field: "Font Family" Default: Inter, - apple- system, BlinkMacSystemFont, "Segoe UI", Roboto, sans- serif
You Can:
- Keep default (recommended)
- Enter custom font family

The Typography & Advanced Colors section allows you to customize fonts, text colors, and message bubble colors for a fully branded experience.
Step 4.5: Welcome Message
Field: "Welcome Message" What to Enter: The first message customers see
Example:
Welcome Message: Hello! How can I help you today?
Best Practices:
- Keep it friendly and helpful
- Explain what customers can ask
- Set expectations
Step 4.6: Placeholder Text
Field: "Placeholder Text" What to Enter: Text shown in the input field
Example:
Placeholder Text: Type your message...
Step 5: Review Live Preview
What You'll See
On the right side of the form, you'll see a Live Preview that shows:
- Your chat interface as it will appear
- Real- time updates as you type
- Colors, logo, and messages
Visual Layout
 [Live Preview]
 Form Fields
 [Your Logo]
 [Name] Welcome Message
 [Slug]
 [API Endpoint] [Chat Messages]
 [API Key]
 [Branding...] [Input Field]
Tip: Use the preview to see exactly how your interface will look! The preview updates in real-time as you make changes to branding, colors, and messages. The edit page also shows connected domains if you've set up custom domains for this interface.
Step 6: Save Your Interface
What You'll See
At the bottom of the form:
- "Save Interface" button (primary action)
- "Cancel" button (secondary action)
Step 6.1: Click Save
Button: "Save Interface" Location: Bottom right of form
What Happens:
- Form validates all fields
- Creates your chat interface
- Shows success message
- Redirects to edit page
Step 6.2: Success!
You'll see:
- Success toast notification
- Redirect to edit page
- Your interface is now live!
Step 7: Access Your Interface
Public URL
Your chat interface is immediately available at:
https://public.axiestudio.se/chat/your- slug
What You Can Do
- Share the URL with customers
- Embed on your website using an iframe
- Test it by visiting the URL
- Edit it anytime from the dashboard
Visual Workflow Summary
 STEP 1: Navigate to Chat Interfaces
 Dashboard Chat Interfaces


 STEP 2: Click "Create New Interface"
 [+ Create New Interface] button


 STEP 3: Fill in Basic Information
 - Name: "Customer Support"
 - Slug: "customer- support"


 STEP 3: Connect to Your AI
 Option A: Select Knowledge Base (easier)
 OR
 Option B: External API
 - API Endpoint: https://your-api.com/...
 - API Key: [your-api-key]
 - [Test Connection] (recommended)


 STEP 5: Customize Branding
 - Brand Name, Logo, Colors
 - Welcome Message, Placeholder
 - See Live Preview update in real- time


 STEP 6: Save Interface
 [Save Interface] button
 Success! Redirected to edit page


 STEP 7: Your Interface is Live!
 https://public.axiestudio.se/chat/your- slug
 Share, embed, or test it!
Common Questions
Can I edit my interface later?
Yes! Click "Edit" on any interface in the list to modify it.
What if my slug is taken?
You'll see an error message. Choose a different slug (e.g., customer- support- 2).
Do I need to test the connection?
No, but it's recommended to ensure your API works before saving.
Can I change colors later?
Yes! All settings can be changed anytime from the edit page.
Next Steps
- Set up a custom domain →
- [Add a knowledge base ](/docs/knowledge- base/intro)
- View analytics
Ready to create your interface? Go to Dashboard Chat Interfaces Create New Interface!